Tool Box room project

harryhides

Member
Joined
Oct 7, 2006
Messages
4,429
Location
Canada
Name
Tony
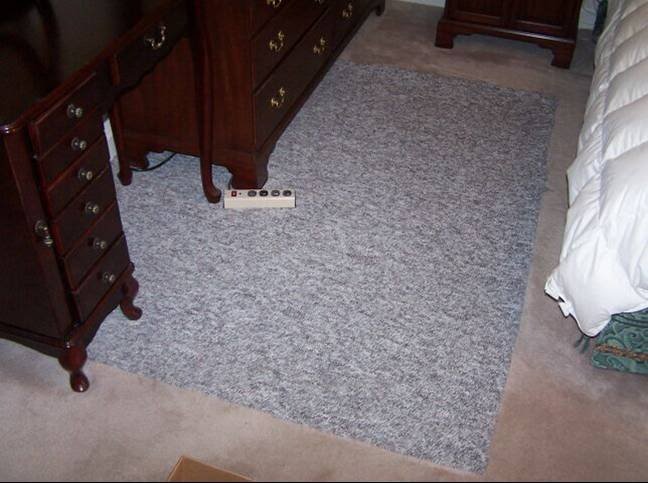
I have been asked to a repair bunch of commom carpet repairs in a 12,000 sq ft office.
This carpet is 5 yrs old or more & it appears to have had no maintenance.
There were no chair pads used and the original Installation ( direct glue down over concrete ) was done by hacks.

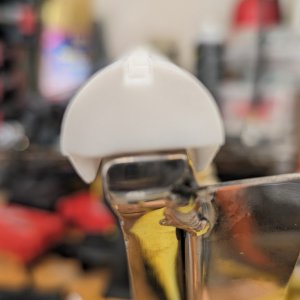
No seam sealing was used and so there is approx 106 feet of sprouts alongside a missing stitch row, like this.

STN5_IMG.jpg


There are 5 rippled areas approx 12 inches long.

STNBrdRm_IMG.jpg


Under where the chairs were we have 14, approx 2 foot circles of delamination.

STN11_IMG.jpg


Some of these 14 areas were also beside those lousy unsealed edges resulting in delamination between the floor and the secondary as well as between the secondary and the primary backing.

STN6_IMG.jpg


STN7_IMG.jpg


So here is the deal.
I'd like to get your input on the following:

How long this should take to complete - separate out each component please ?
How much you would charge with a breakdown of how you arrived at your answer for each component ?
What tools/methods you would utilize for each repair ?

I will time and photograph the job and post the results once it's all done which may be in a couple of weeks.

Deal ??
 

Jack May

That Kiwi
Joined
Oct 7, 2006
Messages
2,423
Location
Palmerston North, New Zealand
Name
John
Hah, Tony uses a STRAW BROOM.... HACK

John

P.S. I've just got in from a 14 hour day... 5 floods, 2 of them 2 storey jobs and already have another 3 on the go, along with 2 fire clean ups. Oh yeah, I also had 3 small carpet jobs and another one that I put off till tomorrow :shock: I'll give it some thoughtb and post later.
 

harryhides

Member
Joined
Oct 7, 2006
Messages
4,429
Location
Canada
Name
Tony
Didn't know what I'd find 'til I got there and needed something to help me to take pics that illustrated the problems.
Only useable implement was that broom so quit ya whining !!
 

safeclean

Member
Joined
Apr 9, 2007
Messages
159
With out being there I would give myself one full day to complete.

Forget about breaking it down just charge by the hour.

Bubble repair glue in a tube and some weights for the delamination.

The seams need to be trimmed, contact glue for the concrete wait for it to dry than latex for the delam. If there is any spare carpet you could use.

Just my thoughts

Craig
 

Jack May

That Kiwi
Joined
Oct 7, 2006
Messages
2,423
Location
Palmerston North, New Zealand
Name
John
Wow, nice job. I'm assuming like Craig that there is no extra carpet available... therefore I'd do the following.

The area delamination is a new one to me not having done that sort of thing before.

For the joins without seal sealer, I'd be seam sealing with hot melt glue and attempt to fix the pulls back in and then trim up any ugly pieces. On a really bad area, I may be tempted to slip some KG tape underneath and risk a little height difference.

For the 5 rippled areas, I (without a syringe) would slit along a row and re laminate with latex glue, hot melt seam the cut and then weight.

For the 14 chair delamination areas, (as above I don't know) so maybe buy a big bore needle and inject section after section with latex and then weights. For the ones over joins, which I have repaired before, I'd screed latex into each side and the hot melt glue the seam and weight.

Cost wise, I've never done a job of that size before and may be tempted to 'day rate' it. I normally piece meal price all my work.

I personally don't like hourly or day rates because them I'm conscious that I need to be active all the time whereas if I've piece priced it, my time is my own. (phone calls, chit chat with managers, netwroking, breaks etc.)

106' of seam sealing approx 32 l/m so maybe 2 hours work max $200.

5 ripples at $30 each = $150.

14 delaminated areas ????? $75 each? $1050.

I price everything based on a min $100/hour but include materials in that as usually materials charge for my work in minimal. I also price PLUS TAX.

So by doing it piece priced, I'd be asking $1400 which would be a full day possibly and then a follow up call the next day to remove weights, trim bits and generally QC the whole job and maybe post vac/spot any concerns if necessary.

John.

And I wouldn't use the STRAW BROOM either, we use dyson vacuums :lol:
 

Harry Myers

Member
Joined
Oct 13, 2007
Messages
1,268
Location
Charlotte, NC
Name
Harry Myers
Well from observing it to begin with the problem is #1 incorrect knotch size. #2 it was not even rolled with a 75 lb roller. If they would have followed the guidlines , none of this should have happened. There would have been enough adhesive where it would have got into the backing. Therefore they would have no delamination. Animals I tell ya , Animals. :twisted:
 

harryhides

Member
Joined
Oct 7, 2006
Messages
4,429
Location
Canada
Name
Tony
Nope, no extra material.

Good stuff so far, keep going guys, the point of this exercise is simply to share ideas on different ways to tackle the job, pricing and tools and adhesives to use.
It's not a right or wrong thing.
This is the "out of the box, thinking" room so lets hear it.

That Harry guy scares me though -
He's worse than those Inspectors that Marc can't stand. :roll:
Lines of dry adhesive was not flat on top as it should be if it had been rolled.

However, I shall do this job - I don't think there will be any other bids and post the pics after and take my licks.
I always tell the customer that it is much harder to fix a bad job than to do it right the first time.
Sounds like they understand and do not expect the moon.

Customer is thinking around $1,000 and since this is the Alabama of Canada that is reasonable.
 

Jack May

That Kiwi
Joined
Oct 7, 2006
Messages
2,423
Location
Palmerston North, New Zealand
Name
John
harryhides said:
Customer is thinking around $1,000 and since this is the Alabama of Canada that is reasonable.


Well that puts me out of the picture :roll:

But like I said earlier, I have no experience with re laminating large areas without access like a join. Not my area so I was guessing.

John
 

Harry Myers

Member
Joined
Oct 13, 2007
Messages
1,268
Location
Charlotte, NC
Name
Harry Myers
My point of view. Take up the whole seam area .. The glue is insufficient anyhow. It should be easy. Or rip up enough to use the pattern stretcher on it or crabjack. This will allow for a better edge. Use my pattern stretcher on thoat seam I estimate 1 to 1 1/2 hours. I would even think about peeling that desk area back. Simple enough. Also I would get that capital adhesive that Steve displayed Inject those babies and roll them into the adhesive . I say around 4 to 6 hrs with problems.
 

harryhides

Member
Joined
Oct 7, 2006
Messages
4,429
Location
Canada
Name
Tony
I was thinking I'd pulled back enough carpet along those unsealed edges and then re-applied some adhesive.
Then using my pattern stretcher, I may be able to close that gap.

Whaddya think ?
 

Stevea

Member
Joined
Feb 3, 2007
Messages
436
Hi Tony and all,

Pretty neat looking project to work on, too bad we could not do this as a field trip for all here, that would be pretty good to work on as a large team.

Many of the seams, as Harry and others have said, should be able to be pulled together with a mini stretcher and carefully work the edges, many times very rough edges can be made to look pretty good. The whole place looks pretty rough but then that is why they have someone like you caring for it.

Here is a partial clip of a 4 1/2 inch saddle donor piece I have to put into a 5 1/4 inch area and the donor piece was from a well used piece with a lot of badly frayed edges and I could not even trim them but had to work them in. The video is rather long showing the whole repair but hopefully this small portion will give a good idea of pulling the edges together and working with hot melt to seal. These two edges of the saddle also have Kool Glide tape underneath to fuse it all together when it is finished, hope it helps explain a little.
th_f7e5f4eb.jpg
 

Stevea

Member
Joined
Feb 3, 2007
Messages
436
Sorry, I did not mean to send the last post with out a little more explaining.

The mini stretcher allows one to work a portion of the seam, as you see in the video, then you move over and work the next 6-10 inches or so until the whole seam is completed. I hope that makes sense.

Anyway, looking forward to seeing the end results.

SA
 

Harry Myers

Member
Joined
Oct 13, 2007
Messages
1,268
Location
Charlotte, NC
Name
Harry Myers
tony i would also do that to . I agree. And I have done it as a matter of fact a school also. i did not watch Steves clip yet. so I will watch it now.
 

Harry Myers

Member
Joined
Oct 13, 2007
Messages
1,268
Location
Charlotte, NC
Name
Harry Myers
Steve that was good enough for me. Excellent littleclip in seconds. What concerns me here and Tony and You I m sure is that delamination . so in this case I would agree with Tony to re glue in other cases that was a great tip. Thanks. :D
 

Stevea

Member
Joined
Feb 3, 2007
Messages
436
Harry,

I agree, he will have to re-laminate, this can be done with Hot Melt; Bubble Glue or Latex. I personally like to use hot melt on smaller areas and Bubble Glue on larger areas.

On the seams, if it is possible to dis-engage from the floor, I would put the Double Sided Kool Glide tape down, re-laminate, clean up the edges and hot melt them and finish with Kool Glide. This will hold it in place very well and fuse everything together. I would definitely use the Kool Glide hot melt in my repairs, stuff is easy to use and work and holds fantastic.

Here is a damaged seam:
seamrepairdoublestick21-prepingR.jpg


open the seam to put Kool Glide tape under, double sided tape
seamrepairdoublestick24-prepingR.jpg


pulling together a portion and working that area
seamrepairwithclaw3.jpg


working another area
seamrepairwithclaw.jpg


finishing
seamrepairwithclaw2.jpg


finished and repaired seam
tornseam5.jpg


A seam, even if it is frayed and angled, can still be manipulated to come out pretty good using this method. Working the seam a little at a time helps a lot. This is an area to think outside the box from what is normally done.
 

Harry Myers

Member
Joined
Oct 13, 2007
Messages
1,268
Location
Charlotte, NC
Name
Harry Myers
Steve Seam Tape added to a seam will make it stronger. i like your sugestion as well. Being there is already a problem. It is people like you and I that like to conclude the problem. Double stick Kool Glide tape after a spread of adhesive would really be tha way to go. Steve Excellent post . I love those pictures. Very clear explanitive . nice.
 

Stevea

Member
Joined
Feb 3, 2007
Messages
436
Harry,

Thanks for understanding what I was trying to say, I have found this to be an excellent way to repair this type of situation and be relatively sure it will stay together. When I do this with woven goods, I like to use a hidden stitch to re-enforce the seam as well.
I consider it a real compliment coming from someone with your skills and background.

This is a great post Tony set up, a lot of learning on this and visuals to help all of us analyze something we may not be familiar with or might be timid with. I like the way he uses questions and makes us all think, great teaching lesson. Thanks Tony.

SA
 

Shorty

RIP
Joined
Nov 8, 2006
Messages
5,111
Location
Cairns
Name
Shorty Glanville
Tony,
how did you go with this DS problem ??

Ooroo :roll:


PS ::: DS = Direct Stick
 

hogjowl

Idiot™
Joined
Oct 7, 2006
Messages
48,025
Location
Prattville, Alabama
From the time you hot glue the edges to seal it, and pull the seam together, how long before you can come behind and kool glide the seam? Seconds ... minutes?
 

Jack May

That Kiwi
Joined
Oct 7, 2006
Messages
2,423
Location
Palmerston North, New Zealand
Name
John
Marty, I'f you're using a Kool Stick, (hot melt glue form Kool Glide) then it doesn't really matter as the welding action of the tape will reactivate the hot melt glue as well and bond as 1 final unit including seam sealing as well.

John.
 

hogjowl

Idiot™
Joined
Oct 7, 2006
Messages
48,025
Location
Prattville, Alabama
Well damn ... if you'd posted this before I ordered my Kool Glide (just a minute ago) I would have ordered a Kool Stick too. Now I gotta go back and try to stay focused all over again!

Where's my Stratera?
 

ksokalski

Member
Joined
Oct 10, 2006
Messages
44
Question: If I was able to pull up enough of the carpeting along the delaminated edges...I would most likely use hot melt with a T-tip to perform the relamination. However, in this circumstance, what would you consider the best fix for this problem?

I would imagine latex or bubble glue. However, how would you keep the relamination process from bonding the whole piece of ripped carpeting back to the sub-floor; especially if you cannot pull enough carpeting back to really work the backing before you re-adhere together with the KoolGlide?
 

Stevea

Member
Joined
Feb 3, 2007
Messages
436
Hi Kris,

So good to see you here posting, you will add a lot to this room!

Kris sent me some of his repairs, I will try to post them sometime and let others see some interesting work as well, even his son was doing repairs.

Take care Kris
 

Jack May

That Kiwi
Joined
Oct 7, 2006
Messages
2,423
Location
Palmerston North, New Zealand
Name
John
Congrats Kris, that's a strong recommendation.

Great to have your participation.

Definitely post some piccies for us, that's one way in which this room is so different from anything else that's I've seen and is possibly in part due to it's success.

When people can see and visualise something, it makes them far more likely to attempt it.

John
 

Stevea

Member
Joined
Feb 3, 2007
Messages
436
I thought it would be good to show some of the Repair Work Kris does, and his son. He shared these photos of a repair he did and I thought I would share them with this room, I think everyone will appreciate his skills and I hope he shares more with all of us here.

He had a client with a terrible 'patch' in a room, so he took several pieces of carpet and made a very large 'patch' and replaced the old bad patch. Looks pretty good but notice how he had to make a large piece by use of several smaller ones, the sewing of the backing and sealing and then how he used the Kool Glide to put it in place, quite a good job. His son is only about 12, I think, but obviously a good technician in the makings.

Hope you do not mind me sharing these with the room Kris.

Bad patch, watch the series of steps to repair

kris-7.jpg


repair in progress; please click on photo to start slide show
th_kris-7.jpg

before and after
kris-7.jpg

kris-6.jpg


Pretty nice job.

SA
 

Attachments

  • kris-7.jpg
    kris-7.jpg
    42.8 KB · Views: 151

ksokalski

Member
Joined
Oct 10, 2006
Messages
44
...it was actually a pretty 'fun' repair to do. It cuts the monatony of restretch after restretch.
 

Jack May

That Kiwi
Joined
Oct 7, 2006
Messages
2,423
Location
Palmerston North, New Zealand
Name
John
Kris, with a post like that above me, are you a layer primarily?

Not that we'll hold that against you :wink:

I've done jobs like that too where yiou don't/can't get 100% but it's 100% better than what was there (is that irish or what :oops: )

DSCN1536web.jpg


Dscn1552web.jpg


FROM MY WEBSITE.
Pot Plants and Rotten Carpet. One job we completed was for a private customer without insurance. She had a combination of an over watered pot plant and a pumpkin from an old Halloween decoration that exploded. While the carpet repair is obvious as you enter the hallway, its way better visually than the original problem. The donor carpet is in the foreground of the first photo showing colour and wear differences.

Cheers, John
 
Back
Top Bottom