- Joined
- Jun 29, 2015
- Messages
- 7,504
- Name
- Stephen
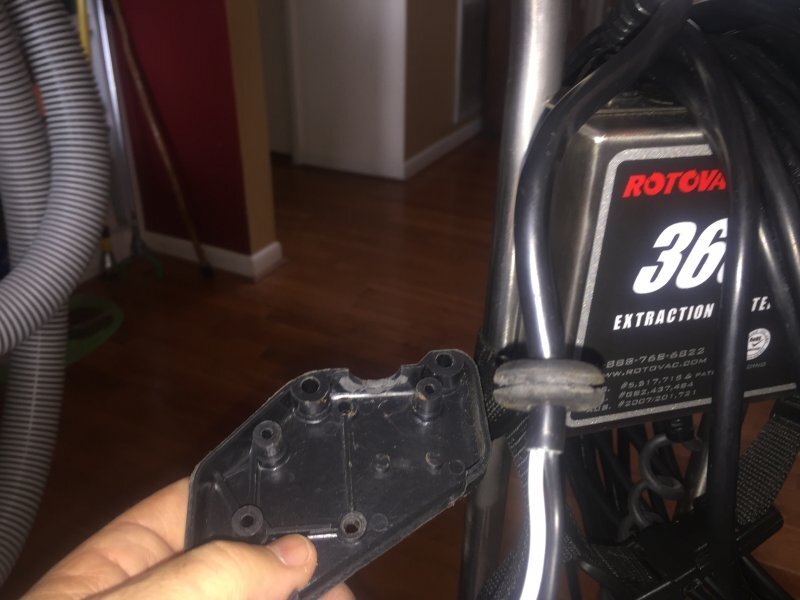
My handle broke because the handle plastic is not reinforced around the hole for the on/off switch button. A simple washer does not provide sufficient load distribution.

When you take it apart, observe every little piece CLOSELY. Take a picture if you must. The grommet here was glued and had to be carefully pried off the two sides of the opening.

Now to reinforce the handle internally!
I used a light fixture hanging bar because I needed a substantial washer up inside the handle. It had to be long enough to disperse the pulling stress around the button hole. That skinny nut is off the switch so I could judge how big to make the hole.

First I drilled and reamed out the hole so the button switch can be inserted through it.

But it was a little too wide to slide into the handle and way too long.

If you look closely, I marked the end cut and where I’d need to notch to accommodate the cast plastic supports in the new handle.

Then I cut them. Don’t cut the handle plastic, cut the metal. The plastic is already weak enough. Now the home made washer fits inside the handle and will provide some support when the switch is installed.

This is an on-edge view of how it will go together. The old washer is now sandwiching the plastic between itself and the internal home made washer. There is an internal nut (sets depth), the new washer, plastic, the old washer, then the external nut (tightens it all up).

Re-assembly is a pain. Use spots of duct tape to hold the bolt heads from the outside so you can put the spacers and other bits in place. NOTE the tag of tape holding the plastic hanger on the wires so the hole is over the plastic stud. Pull that tag out when you get a screw started (once the other half is put over this half). Look close to see what I mean.
The switch nuts and washer are not yet tight. You will struggle to get the grommet to accept the reassembly, so make sure the handle halves are clean and smooth with no bits of rubber or plastic to hang up. REMEMBER THE BOLTS GO FROM INSIDE TO OUTSIDE!

Re-assembled with sponge rubber handle covers. Before you put them on though, test the switch to ensure that once the external nut is snugged tight, your little hand bar properly activates the button on and off. Hint: the internal nut stops it from sticking out too far. Diddle with this BEFORE YOU ASSEMBLE, or you will have to back up to the last picture and adjust it. When it is right, put on the rubber grip. You are finished with the left handle.

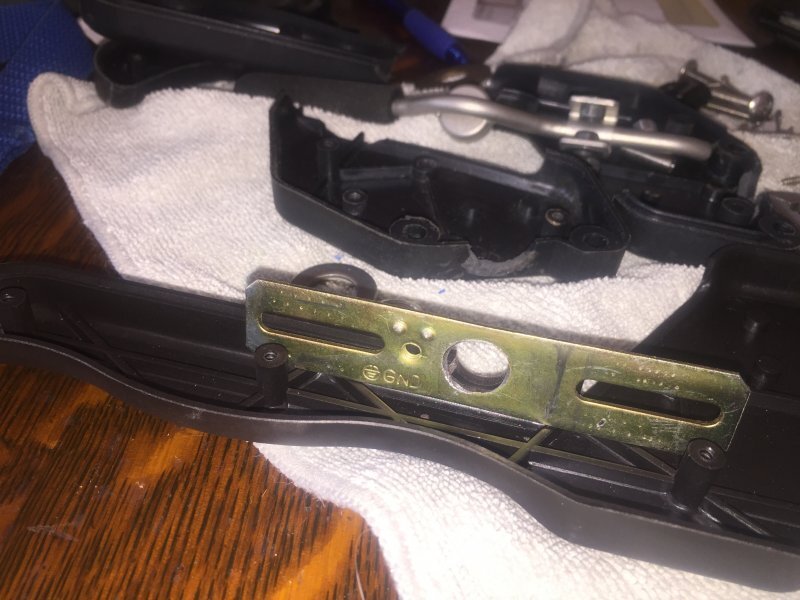
On the right hand grip, the mounting bolts had been tightened too much (there are no spacers) and it caused the screw posts to snap off. Glue didn’t help. It is a much easier fix, just disassemble and replace. Do not over torque the screws. When they bottom out, let them alone.

The right side done. YAY!

This failure of the handle is a design issue, which should be addressed with fiber reinforced plastic instead of the thin, molded plastic currently used. Until then, you just have to understand the the handles are not rugged enough to withstand bashing around.
I absolutely love the 360i and think it is a “must have.” Brian at Rotovac got my new pieces out to me promptly.
If your handle snaps and you want a friendly coach, PM me and I’ll talk you through it.
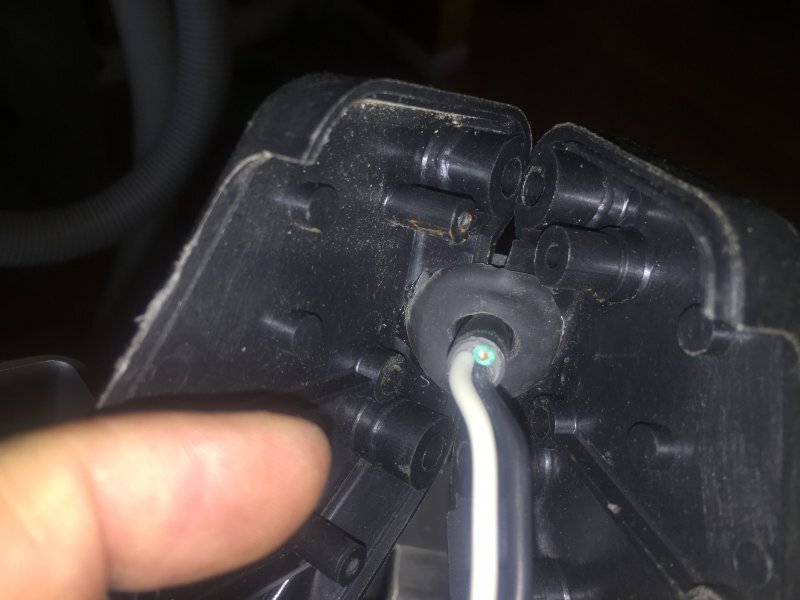
When you take it apart, observe every little piece CLOSELY. Take a picture if you must. The grommet here was glued and had to be carefully pried off the two sides of the opening.
Now to reinforce the handle internally!
I used a light fixture hanging bar because I needed a substantial washer up inside the handle. It had to be long enough to disperse the pulling stress around the button hole. That skinny nut is off the switch so I could judge how big to make the hole.
First I drilled and reamed out the hole so the button switch can be inserted through it.
But it was a little too wide to slide into the handle and way too long.
If you look closely, I marked the end cut and where I’d need to notch to accommodate the cast plastic supports in the new handle.
Then I cut them. Don’t cut the handle plastic, cut the metal. The plastic is already weak enough. Now the home made washer fits inside the handle and will provide some support when the switch is installed.
This is an on-edge view of how it will go together. The old washer is now sandwiching the plastic between itself and the internal home made washer. There is an internal nut (sets depth), the new washer, plastic, the old washer, then the external nut (tightens it all up).
Re-assembly is a pain. Use spots of duct tape to hold the bolt heads from the outside so you can put the spacers and other bits in place. NOTE the tag of tape holding the plastic hanger on the wires so the hole is over the plastic stud. Pull that tag out when you get a screw started (once the other half is put over this half). Look close to see what I mean.
The switch nuts and washer are not yet tight. You will struggle to get the grommet to accept the reassembly, so make sure the handle halves are clean and smooth with no bits of rubber or plastic to hang up. REMEMBER THE BOLTS GO FROM INSIDE TO OUTSIDE!
Re-assembled with sponge rubber handle covers. Before you put them on though, test the switch to ensure that once the external nut is snugged tight, your little hand bar properly activates the button on and off. Hint: the internal nut stops it from sticking out too far. Diddle with this BEFORE YOU ASSEMBLE, or you will have to back up to the last picture and adjust it. When it is right, put on the rubber grip. You are finished with the left handle.
On the right hand grip, the mounting bolts had been tightened too much (there are no spacers) and it caused the screw posts to snap off. Glue didn’t help. It is a much easier fix, just disassemble and replace. Do not over torque the screws. When they bottom out, let them alone.
The right side done. YAY!
This failure of the handle is a design issue, which should be addressed with fiber reinforced plastic instead of the thin, molded plastic currently used. Until then, you just have to understand the the handles are not rugged enough to withstand bashing around.
I absolutely love the 360i and think it is a “must have.” Brian at Rotovac got my new pieces out to me promptly.
If your handle snaps and you want a friendly coach, PM me and I’ll talk you through it.
Attachments
Last edited:


