GeneMiller
Member
- Joined
- Mar 24, 2009
- Messages
- 3,547
- Name
- gene miller
This is not a bash the machine thread. I’m still very happy with the machine. It’s had a few hiccups that I solved but none that didn’t left me finish a job If I get time I might post an update about it
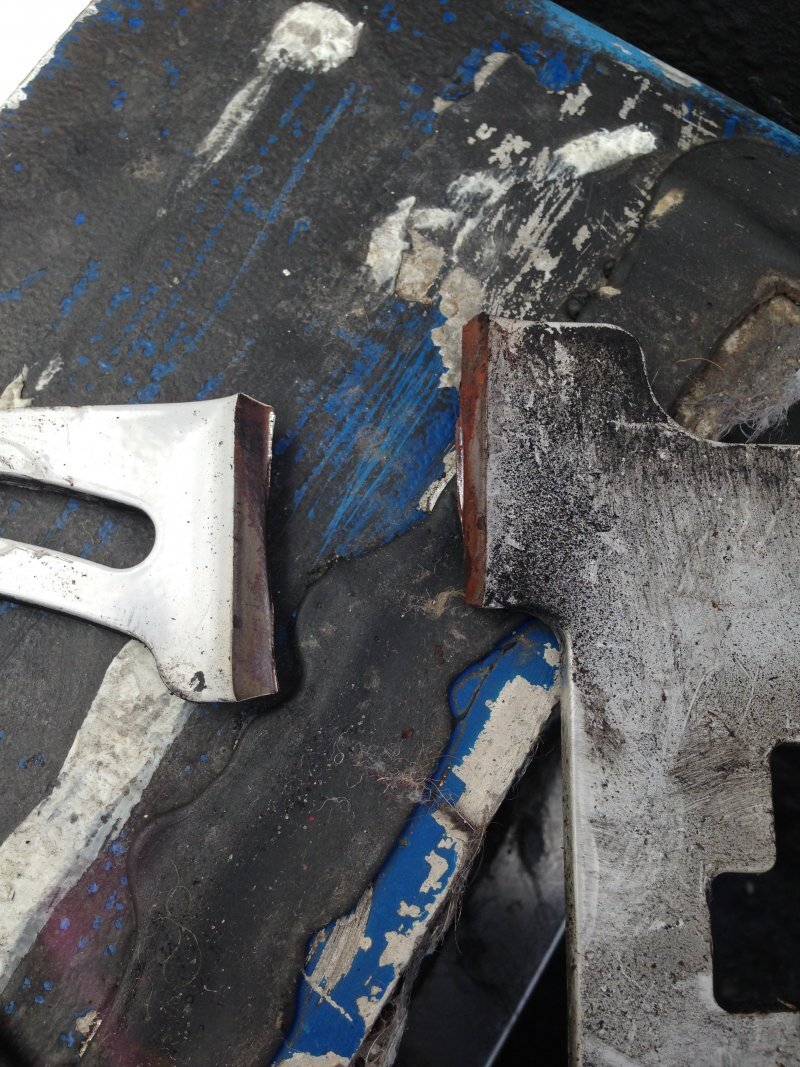
Thursday we set up on a house and get the first room treated. It turns over but won’t start. I pull the waste lid and sure enough the float is stuck up. Problem solved and we start. 3 hours later we are almost done and I’m bringing excess hose Out and I hear a ticking sound. The belt on the pump is unraveling. I rush back in and take over the zipper and finish rinsing the last room. Yes, we still only use the zipper. The belt pops but I’m done. It just needs vacuumed. Luckily it was a clean room to begin with. While John is rolling up I start popping covers so it can cool. I figure I’ll change the belt at the next house. I have extras for everything onboard including my truck. I dig out the broken belt parts and since it’s an inside belt I looseN the alternator and thiS is what I found.
I was pretty surprised when I loosened the bolt And this fell off. Unfortunately it’s formed into the motor mount and you have to remove it to repair. Because of the way it broke the pressure was keeping it in place. I hate it when fixing one thing you find another. Does everything come in threes
so why did 1/4“ steel break from the pressure of a belt If you look closely at the break you can see rust in all but a small area. When they bent it, it cracked. It just didn’t get noticed.
For anyone wanting to know how to fix it : start by disconnecting the battery and theN the 3 wires connected to the Alternator. Replace the nuts back on where you took off the wires.. if you don’t a spacer will fall out.
don’t bother trying to Remove the long bolt to remove the alternator, it’s a captured bolt. That means there isn’t enough room to get it out. It should go in the other way so You could just pull it out and remove the alternator. Instead, you have to get to the two bolts holding the bracket. Once those are out the alternator is free. Remove the rest of the bolts holding the plate plus loose the 2 large bolts from the plate above and remove the small bolt going through both plates. You can now slide out the bracket. Clean up and tack the part. bolt the alternator back on the plate and verify the adjusting bolt will swing free through it’s range.. It’s a very tight fit so weld it correctly or you’ll create more work. I didn’t weld with the alternator attached I removed it each time. I don’t know enough to be sure it wouldn’t harm the electronics. When your done left it cool and then verify you still have everything aligned correctly. Reverse. A little helpful hint. To make it easier to put back the alternator , reverse the pivot bolt and cut the wire ring to a slotted end. Or put one Of the mounting bolt in from the back, Hand tight ,nearest the front of the machine to act as a guide. Once you get one Bolt in you can reach back and unscrew it with your hand. There is plenty of space. You could also get long bolts and put them in the bracket and use nuts.
things that bothered me about this repair. Simply reversing the direction the bolt goes in on the alternator makes the job easier. The only difference is the wire used as a ground wouldn’t use a ring style fitting. You can easily just cut the ring so it goes around the bolt. Also the bottom of the bracket has 2 bolts which are also captured. They should drop in from top and have nuts on the bottom. It doesn’t really matter, they do fall down enough to allow the bracket to come free. I think the small bracket holding the Alternator should sit on studs. It would make it easier. the bracket that the alternator pivots on strikes the body preventing it from freely tilting back. The corners just needed rounding and it would swing back all the way. None of these things are that important, It just bothers me.
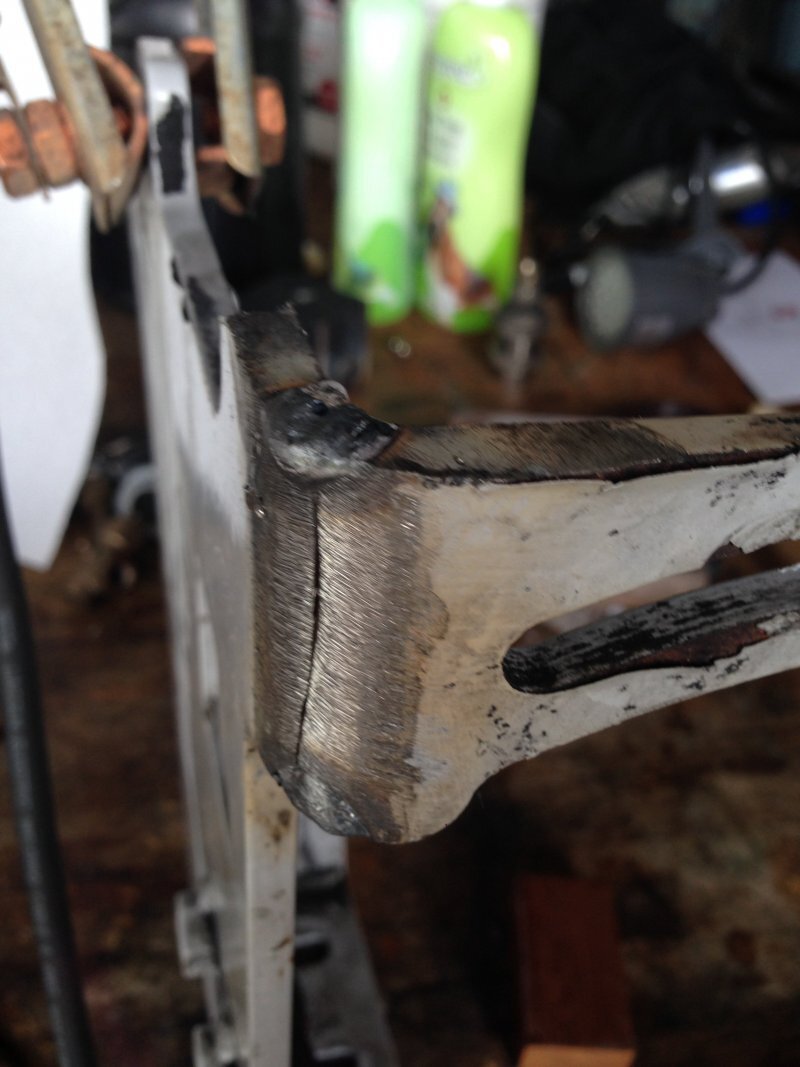
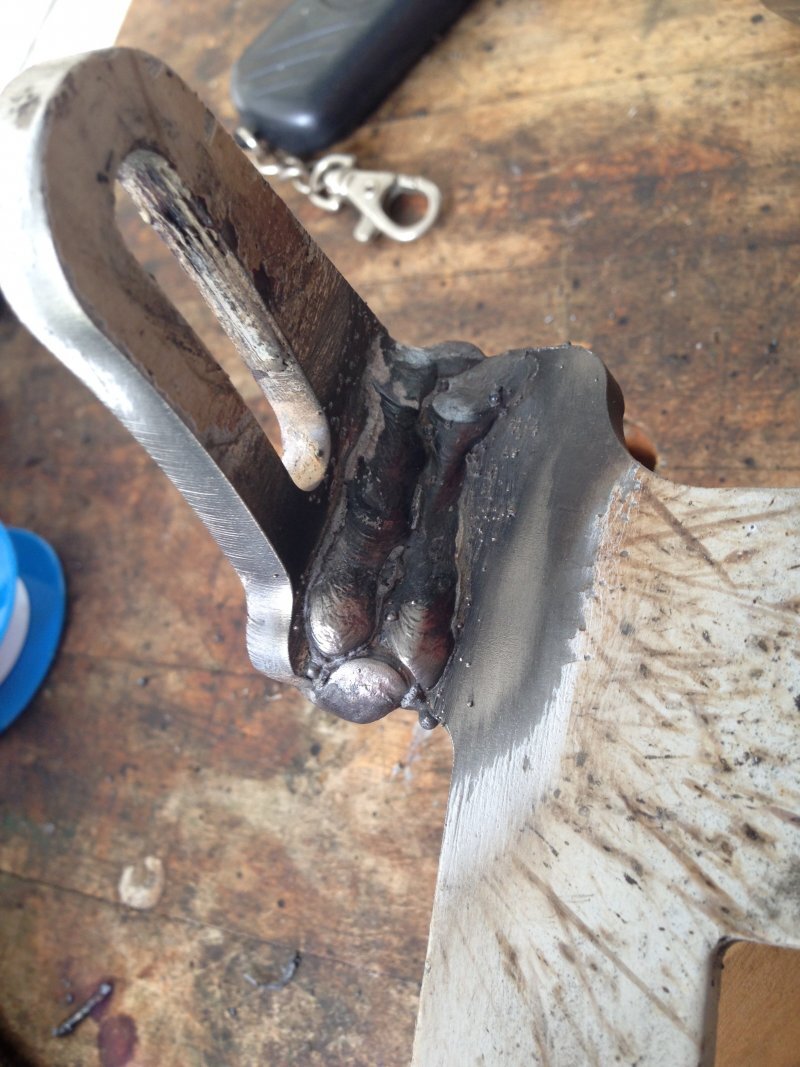
yes I know my welding isn’t the pretties but it’s strong.. it’s also welded on the back. I’ve tested my welds before, after grinding flat, and can’t break Them with a sledge. The front was a pretty blue after welding the back confirming the correct heat. Since I don’t weld much I normally practice on a piece of scrap. I didn’t have one. I’m confident this will outlast the machine.


Thursday we set up on a house and get the first room treated. It turns over but won’t start. I pull the waste lid and sure enough the float is stuck up. Problem solved and we start. 3 hours later we are almost done and I’m bringing excess hose Out and I hear a ticking sound. The belt on the pump is unraveling. I rush back in and take over the zipper and finish rinsing the last room. Yes, we still only use the zipper. The belt pops but I’m done. It just needs vacuumed. Luckily it was a clean room to begin with. While John is rolling up I start popping covers so it can cool. I figure I’ll change the belt at the next house. I have extras for everything onboard including my truck. I dig out the broken belt parts and since it’s an inside belt I looseN the alternator and thiS is what I found.
I was pretty surprised when I loosened the bolt And this fell off. Unfortunately it’s formed into the motor mount and you have to remove it to repair. Because of the way it broke the pressure was keeping it in place. I hate it when fixing one thing you find another. Does everything come in threes
so why did 1/4“ steel break from the pressure of a belt
For anyone wanting to know how to fix it : start by disconnecting the battery and theN the 3 wires connected to the Alternator. Replace the nuts back on where you took off the wires.. if you don’t a spacer will fall out.
don’t bother trying to Remove the long bolt to remove the alternator, it’s a captured bolt. That means there isn’t enough room to get it out. It should go in the other way so You could just pull it out and remove the alternator. Instead, you have to get to the two bolts holding the bracket. Once those are out the alternator is free. Remove the rest of the bolts holding the plate plus loose the 2 large bolts from the plate above and remove the small bolt going through both plates. You can now slide out the bracket. Clean up and tack the part. bolt the alternator back on the plate and verify the adjusting bolt will swing free through it’s range.. It’s a very tight fit so weld it correctly or you’ll create more work. I didn’t weld with the alternator attached I removed it each time. I don’t know enough to be sure it wouldn’t harm the electronics. When your done left it cool and then verify you still have everything aligned correctly. Reverse. A little helpful hint. To make it easier to put back the alternator , reverse the pivot bolt and cut the wire ring to a slotted end. Or put one Of the mounting bolt in from the back, Hand tight ,nearest the front of the machine to act as a guide. Once you get one Bolt in you can reach back and unscrew it with your hand. There is plenty of space. You could also get long bolts and put them in the bracket and use nuts.
things that bothered me about this repair. Simply reversing the direction the bolt goes in on the alternator makes the job easier. The only difference is the wire used as a ground wouldn’t use a ring style fitting. You can easily just cut the ring so it goes around the bolt. Also the bottom of the bracket has 2 bolts which are also captured. They should drop in from top and have nuts on the bottom. It doesn’t really matter, they do fall down enough to allow the bracket to come free. I think the small bracket holding the Alternator should sit on studs. It would make it easier. the bracket that the alternator pivots on strikes the body preventing it from freely tilting back. The corners just needed rounding and it would swing back all the way. None of these things are that important, It just bothers me.
yes I know my welding isn’t the pretties but it’s strong.. it’s also welded on the back. I’ve tested my welds before, after grinding flat, and can’t break Them with a sledge. The front was a pretty blue after welding the back confirming the correct heat. Since I don’t weld much I normally practice on a piece of scrap. I didn’t have one. I’m confident this will outlast the machine.


